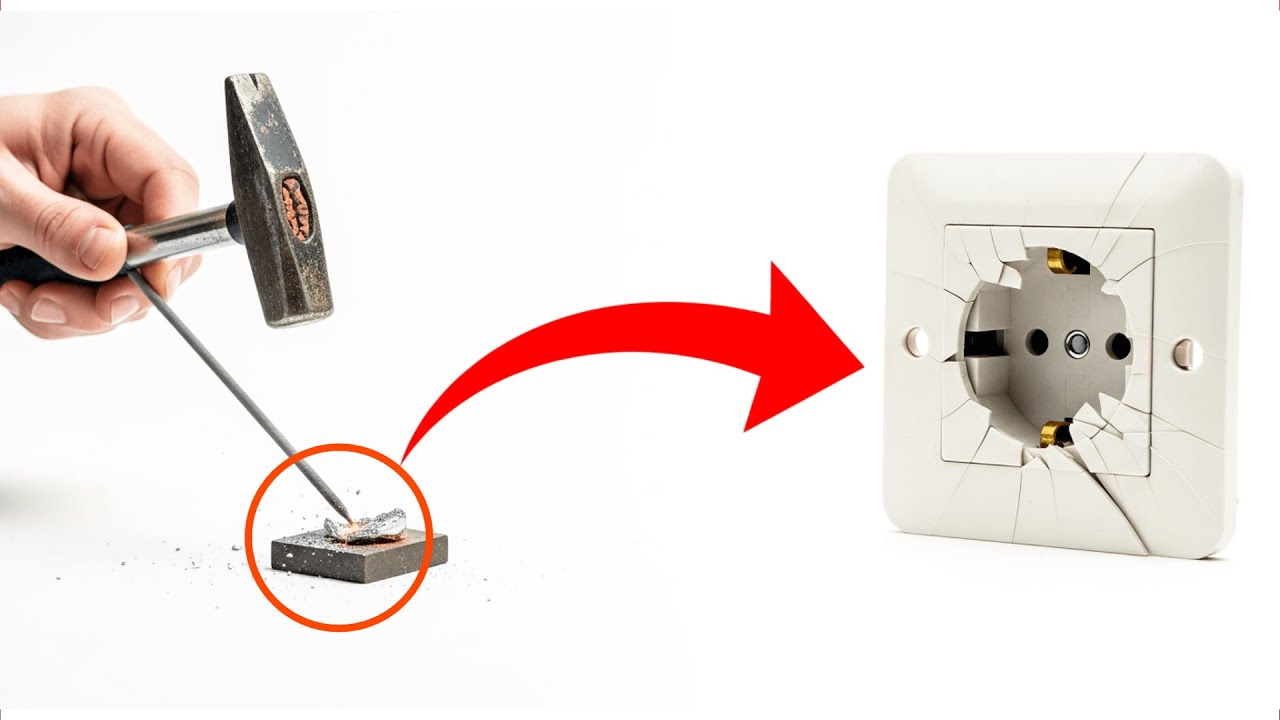
Repair a Cracked Outlet with This 1 Simple Trick Using Welding Rod Powder!
Repair a Cracked Outlet with This Simple Trick Using Welding Rod Powder
- Introduction
- Understanding the Problem
- Materials Needed
- Step-by-Step Repair Process
- Common Mistakes
- FAQ
- Conclusion
Introduction
Finding a cracked outlet in your home can be unsettling, especially if you rely on it for powering essential devices. A damaged outlet not only looks unattractive but can also pose safety concerns. While some might consider replacing the entire outlet, there’s a straightforward fix that many homeowners don’t know about. Using welding rod powder, you can repair your outlet quickly and effectively. Read on to discover how you can tackle this repair yourself!
Understanding the Problem
Before diving into the repair process, it’s important to understand the issues a cracked outlet can cause. Here are a few key points to consider:
1. Safety Hazards
A cracked outlet can lead to exposed wiring, increasing the risk of electrical shocks or fire hazards. Addressing the issue promptly can help ensure your home remains safe.
2. Functional Impairment
Besides safety risks, a cracked outlet may not provide stable power, potentially damaging the appliances plugged into it. Regularly checking your outlets can help you catch these issues early.
3. Aesthetic Concerns
Cracks can detract from your home’s appearance. Repairing them not only enhances safety but also improves your space’s overall look. Your outlets can blend seamlessly with your decor when properly maintained.
Materials Needed
For this repair task, you’ll need a few basic materials:
- Welding rod powder – This will be the main component for your repair.
- Clear epoxy resin – Used to bind the welding rod powder to the outlet.
- Mixing container – A small cup to mix your materials.
- Stirring stick – To combine the epoxy and powder.
- Protective gloves – To keep your hands safe during the repair.
Step-by-Step Repair Process
Follow these steps to repair your cracked outlet efficiently:
- Disconnect power to the outlet at the circuit breaker for safety.
- Remove the outlet cover using a screwdriver, exposing the damaged area.
- Prepare the welding rod powder by adding it to your mixing container.
- Add clear epoxy resin to the powder according to the manufacturer’s instructions, stirring until you achieve a thick paste.
- Apply the mixture directly into the cracked area, ensuring it fills all gaps.
- Allow to cure as per the epoxy’s instructions, which usually takes a few hours.
- Reattach the outlet cover and restore power at the circuit breaker.
Safety Tips
Always ensure that the power is off before attempting any electrical work. If you feel uncertain, seeking professional help is advisable.
Visual Cues
For optimal results, maintain a clean workspace and wear gloves. Keeping everything organized can save time and enhance your repair process.
Common Mistakes
While repairing a cracked outlet can be straightforward, there are some common mistakes to avoid:
- Not turning off the power – Always ensure the outlet is deactivated to prevent electrical shocks.
- Using too much epoxy – Overfilling can lead to a messy application that doesn’t cure properly.
- Ignoring drying times – Rushing to restore power before the adhesive cures can compromise the repair.
FAQ
Can I use any kind of glue for this repair?
No, it’s recommended to use clear epoxy resin combined with welding rod powder for a durable repair.
Is welding rod powder dangerous?
While it is safe for this application, it’s important to handle it with care and wear gloves to protect your skin.
How long will my repair last?
When applied correctly, this repair can last for a long time, but regular checks are essential to ensure your outlet’s safety.
Conclusion
Repairing a cracked outlet using welding rod powder is a simple task that can enhance both safety and aesthetics in your home. By following the steps outlined, you can ensure your electrical system remains reliable. Have you attempted any home repairs yourself? Share your experiences in the comments!