Cut Tape Like a Pro: 2-Finger Trick You Need to Try Today!
Mastering the 2-Finger Trick for Effortlessly Cutting Tape
- Introduction
- Overview of the 2-Finger Technique
- Step-by-Step Guide to Using the 2-Finger Trick
- Common Mistakes to Avoid
- FAQ
- Conclusion
Introduction
Have you ever struggled with tangled tape rolls when trying to wrap gifts or finish a DIY project? It can be frustrating to deal with sticky situations and uneven cuts. You’re not alone in this challenge. Many find themselves wasting time wrestling with tape instead of enjoying their crafting or packaging experience. Understanding an effective technique can change your approach. Let’s delve into the simple yet efficient 2-finger trick that makes the task a breeze.
Overview of the 2-Finger Technique
The 2-finger trick is a straightforward method designed to help you cut tape with precision and ease. This technique utilizes your fingers as a guide, ensuring a straight cut while minimizing waste. Not only does it simplify the process, but it also allows for a more controlled application of tape.
Benefits of the 2-Finger Technique
- Efficient: Saves time by providing quick and accurate cuts.
- Control: Enhances your ability to handle tape without struggling.
- Reduced Waste: Helps you cut exactly what you need, minimizing leftover tape.
Materials You’ll Need
Before diving into the steps, gather the following materials for the best results:
- Roll of tape (masking, duct, or gift wrap)
- Scissors (optional)
Step-by-Step Guide to Using the 2-Finger Trick
Now that you understand the technique’s benefits, let’s break down how to master it.
Step 1: Positioning the Tape
- Hold the tape roll in one hand with the dispenser facing away from you.
- Press the roll lightly against your palm to stabilize it.
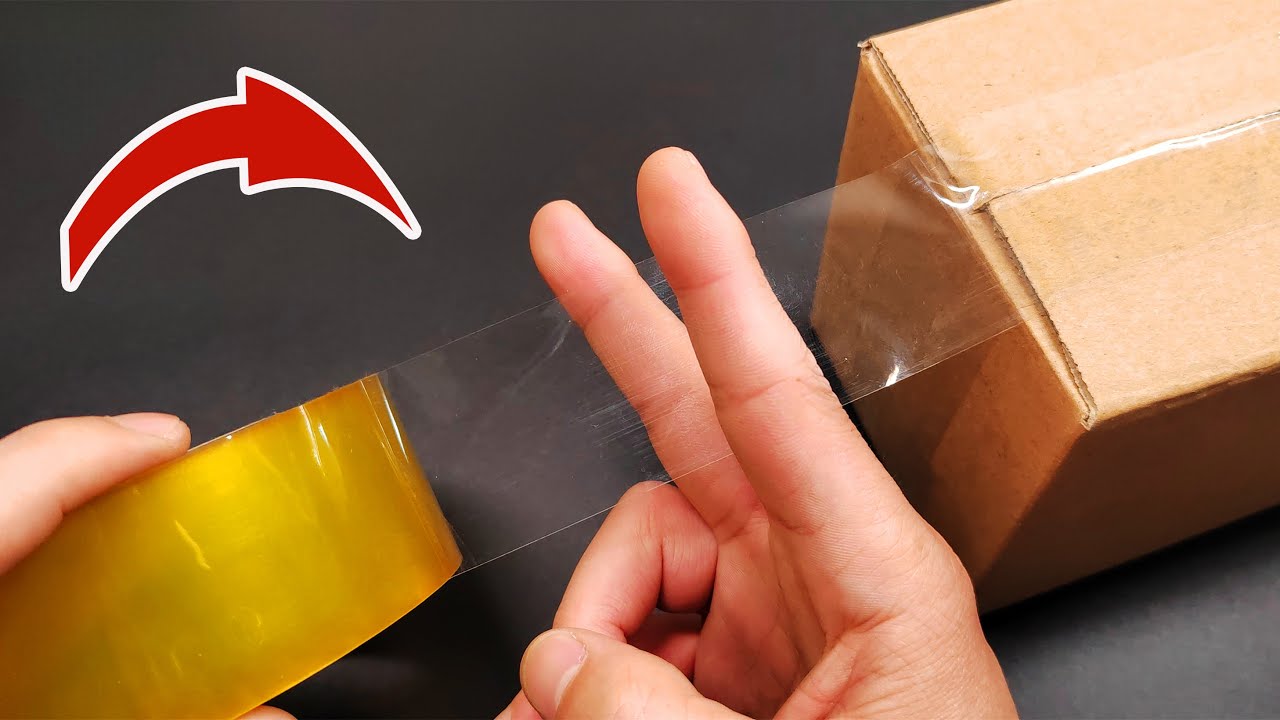
Step 2: Creating Your Cut
- Extend your index and middle fingers to create a small gap between them.
- Place the tape below your fingers, ensuring it’s even with the gap.
- Pull the tape gently while keeping your fingers in place. This creates a natural tension that helps with cutting.
Step 3: Finalizing the Cut
- Adjust the tape’s position as necessary, still maintaining the gap between your fingers.
- Use scissors if needed to make the final cut, or tear it for a clean finish.
Common Mistakes to Avoid
To fully master the 2-finger trick, be aware of these common missteps that can hinder your tape-cutting experience:
- Gripping too tightly: This can make it difficult to control the tape and lead to uneven cuts.
- Inconsistent finger placement: Not positioning your fingers correctly may result in sloppy cuts.
- Rushing the process: Take your time to ensure accuracy rather than hurrying through the steps.
FAQ
What types of tape can I use with the 2-finger trick?
You can use various types of tape, including masking, duct, and gift wrap tape. The method is versatile and works well with most standard rolls.
Can I use this technique with special tape dispensers?
Yes, the 2-finger trick can be adapted with tape dispensers, but it’s most effective when using hand-held rolls for greater control.
Conclusion
The 2-finger trick is a simple, effective way to enhance your tape-cutting skills, allowing for more precision and less waste. Mastering this technique can transform the way you approach DIY projects. What are your favorite tape-related projects, and how do you typically manage tape? Share your tips in the comments below!