7 Creative Ways to Make a Tissue Holder from Ice Cream Sticks!
7 Creative Ways to Make a Tissue Holder from Ice Cream Sticks
- Introduction
- Creative Designs for Tissue Holders
- Step-by-Step Guide to Making a Tissue Holder
- Common Mistakes to Avoid
- FAQ
- Conclusion
Introduction
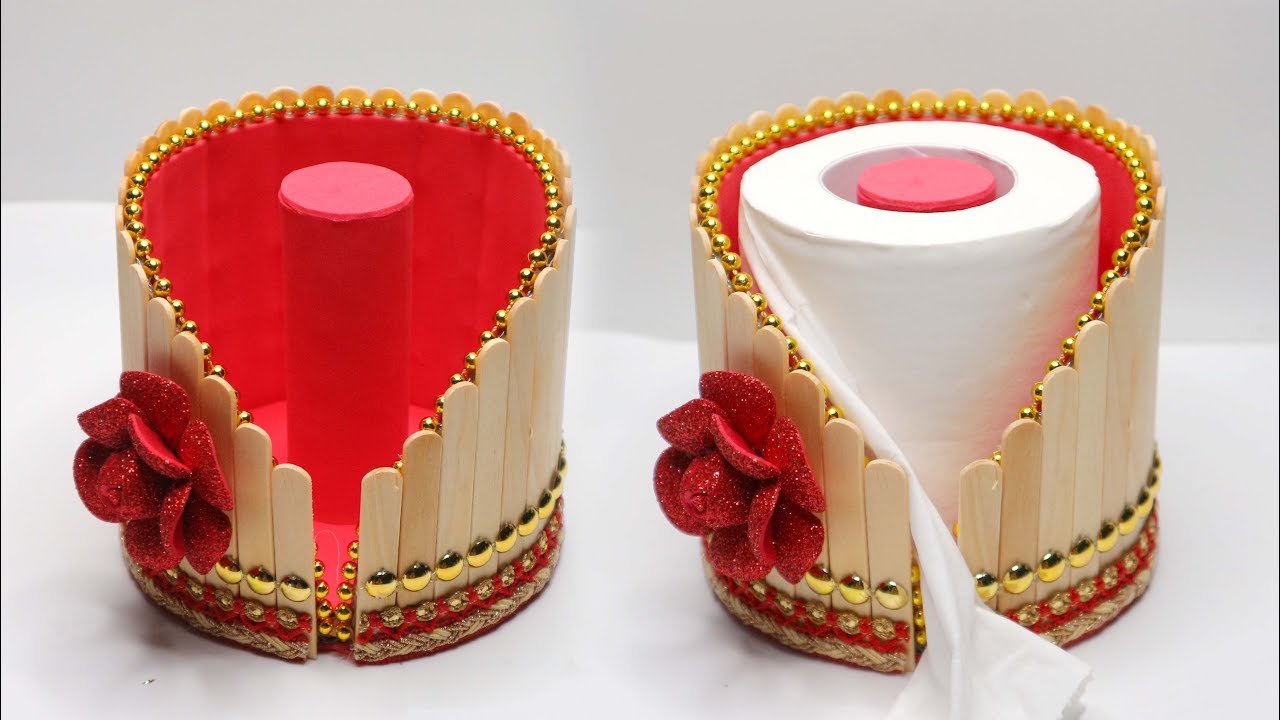
Have you ever found yourself frustrated with an unorganized space, where tissues seem to be everywhere? Instead of just tossing them around, consider creating a stylish and functional tissue holder. Not only will it organize your space, but it can also add a personal touch to your home decor. If you’re looking for a fun DIY project using materials you already have at home, continue reading to discover how you can transform simple ice cream sticks into beautiful tissue holders.
Creative Designs for Tissue Holders
There are numerous ways to customize your tissue holder, and each design can reflect your personal style. Here are some inspiring ideas:
- Rustic Charm: Use popsicle sticks to create a rustic-looking tissue holder, perfect for a country-themed decor.
- Modern Aesthetic: Make a sleek, minimalist tissue holder with painted ice cream sticks in monochromatic colors.
- Kids’ Fun: Design a colorful tissue holder featuring cartoon characters that will brighten up a child’s room.
- Natural Touch: Incorporate twine or jute for a more natural look, giving your holder a warm feel.
Step-by-Step Guide to Making a Tissue Holder
Creating your unique tissue holder can be an enjoyable experience. Follow these detailed steps to craft your own:
Required Materials
- Ice cream sticks
- Glue (hot glue or craft glue)
- Paint (optional)
- Scissors
- Decorative embellishments (optional)
Crafting Your Tissue Holder
- Plan your design: Decide on the style and size of the tissue holder you wish to create.
- Cut the ice cream sticks if necessary, ensuring they fit your design.
- Glue the sticks together in your chosen shape, leaving one end open for tissues.
- Decorate the holder using paint or embellishments to make it reflect your personal style.
- Allow the glue and paint to dry completely before placing tissues inside.
Practical Tips
Here are some practical tips to enhance your project:
- Use a variety of colors for a vibrant look or stick to neutrals for a subtle effect.
- Experiment with different shapes, such as triangular or circular, to suit your space better.
- Incorporate mixed materials like fabric or paper for additional textures.
Common Mistakes to Avoid
When creating a tissue holder from ice cream sticks, it’s important to be aware of common pitfalls:
- Avoid using too much glue, which can lead to a messy appearance.
- Ensure proper drying time; rushing this process can weaken your holder.
- Neglecting to plan your design can result in a lack of cohesion in your project.
FAQ
What type of glue is best for ice cream sticks? Hot glue is recommended for a strong and quick bond, but craft glue can also work if you allow adequate drying time.
Can I paint the ice cream sticks? Yes, painting can enhance the look of your tissue holder and allow you to match it with your home decor.
How do I clean my tissue holder? Gently wipe it down with a damp cloth, avoiding soaking it in water to maintain its integrity.
Conclusion
Creating a tissue holder from ice cream sticks offers a practical solution to an everyday problem while expressing your creativity. Try out different designs and see how you can personalize this project for your space. What style are you most excited to try? Share your thoughts in the comments below!