7 Creative Ways to Transform Plastic Crates into Stylish Shoe Racks
7 Creative Ways to Transform Plastic Crates into Stylish Shoe Racks
- Introduction
- Design Ideas for Your Shoe Rack
- Materials Needed for Your Project
- Step-by-Step Assembly Instructions
- Common Mistakes to Avoid
- FAQ
- Conclusion
Introduction
Do you find yourself tripping over scattered shoes at your front door or in your closet? Storing shoes can quickly become a challenge, especially in smaller spaces. Instead of investing in pricey shoe storage solutions, why not look around your home? With a little creativity, you can transform ordinary plastic crates into functional and stylish shoe racks. This guide will inspire you to rethink everyday items while keeping your space organized.
Design Ideas for Your Shoe Rack
When it comes to creating a shoe rack from plastic crates, the design possibilities are endless. Here are some nifty ideas to spark your creativity:
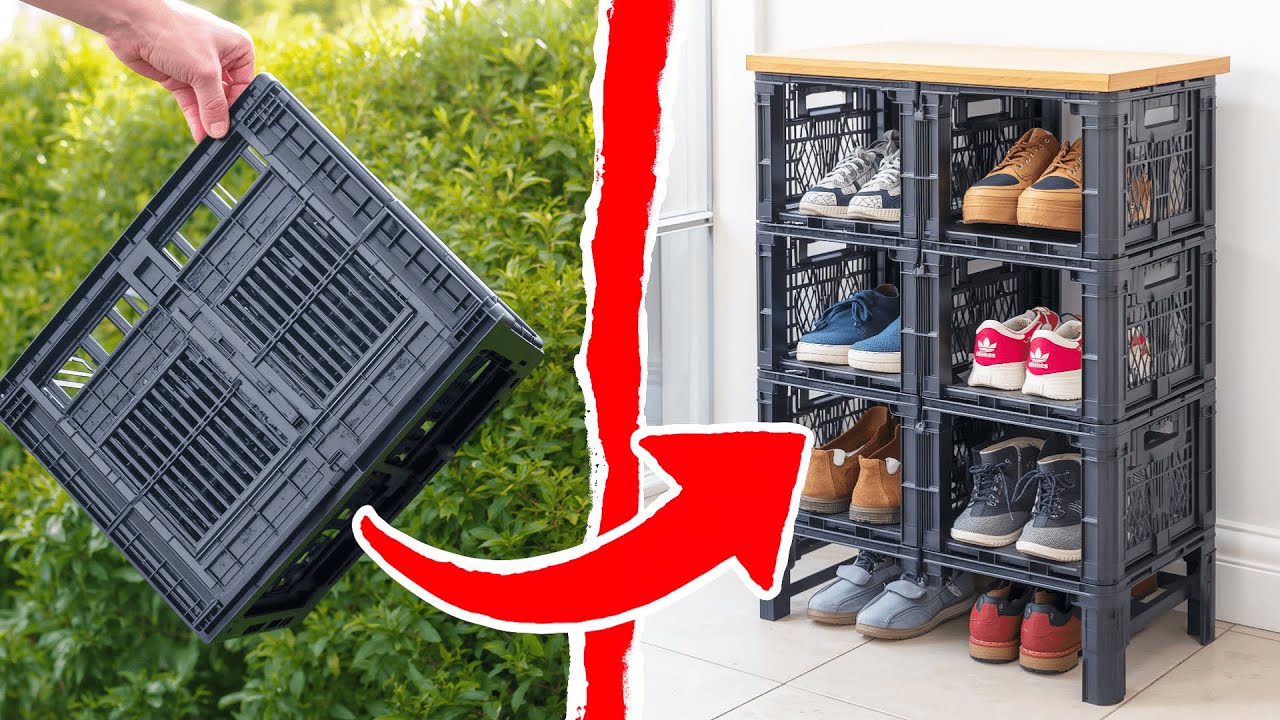
1. Vertical Stacking
One of the simplest ways to use plastic crates is by stacking them vertically. This not only saves space but also allows you to showcase your favorite pairs. Consider painting the crates in matching or contrasting colors for added style.
2. Wall-Mounted Crates
For a more unique approach, you can mount crates to your wall. This keeps the floor clear while adding a decorative element to your entryway. Choose various orientations (horizontally or vertically) to create an eye-catching arrangement.
3. Multi-Functional Bench Rack
Combine functionality and style by creating a shoe rack that doubles as a bench. Stack crates securely and add a cushion on top. This creates a handy place to sit while you put on or take off shoes.
4. Crates with Wheels
Add some mobility to your shoe rack by attaching wheels to the bottom of the crates. This allows you to easily move the rack wherever you need it, whether in the hallway or a closet.
5. Customized Colors and Patterns
Don’t shy away from personalizing your crates. Use paint, stencils, or contact paper to add patterns or colors that match your home decor. Customized crates become a statement piece while serving their purpose.
Materials Needed for Your Project
Once you have a design in mind, gather the necessary materials. Here’s a list to help guide you:
- Plastic crates of your choice
- Paint for coloring the crates (if desired)
- Screwdriver for assembling any parts
- Casters with screws if you opt for a mobile version
- Cushion for creating a bench, if making one
Make sure your crates are clean and dry before starting your project to ensure better adhesion of paint and finishes.
Step-by-Step Assembly Instructions
Now that you have your design and materials, it’s time to get to work. Follow these steps to create your new shoe rack:
1. Prepare the Crates
Before you begin, clean your crates thoroughly. If you plan to paint them, lightly sand the surfaces to help the paint adhere better. Ensure the crates are dry once cleaned.
2. Paint or Decorate
If you’re personalizing your crates, this is the time to do it. Apply paint or any decorations you desire. Allow the paint to dry completely before proceeding to the next step.
3. Arrange the Crates
Decide on how you want to arrange your crates based on your design idea. If stacking, ensure they are stable by securing them with screws from beneath.
4. Attach Casters (if applicable)
If you want a mobile shoe rack, attach the casters to the bottom of your crates using the screwdriver. Make sure they are secured tightly to support the weight.
5. Final Placement
Once everything is assembled and dried, place your new shoe rack in the desired location. Fill it with your shoes, and enjoy your stylish new storage solution!
Common Mistakes to Avoid
During your DIY project, keep these common pitfalls in mind to ensure a successful outcome:
- Not choosing durable crates: Make sure the plastic crates can support the weight of your shoes.
- Overloading the structure: Avoid stacking too many crates or overfilling them, which can lead to instability.
- Skipping preparation: Always clean and dry crates thoroughly. Painting on unclean surfaces will ruin the finish.
- Ignoring design planning: It’s important to have a clear vision before starting to avoid unnecessary adjustments.
- Forgetting ventilation: Ensure your shoes have adequate airflow to prevent odors, especially if they’re stored in closed crates.
FAQ
How do I clean plastic crates? You can simply wash them with warm soapy water and a sponge. Rinse and let them dry completely before using.
Can I paint plastic crates? Yes, you can paint them using spray paint or acrylic paint designed for plastic, ensuring you follow proper prep steps.
What types of shoes can I store in a crate shoe rack? You can store various types of shoes, including sneakers, flats, and even seasonal boots, depending on the height of the crates.
Conclusion
Transforming plastic crates into stylish shoe racks combines functionality and creativity, offering a practical solution to shoe storage. By following this guide, you can design a unique piece that complements your space. What creative ideas do you have for using recycled materials in your home? Share your thoughts in the comments!