7 Steps to Successfully Propagate Phalaenopsis and Get Amazing Results!
7 Steps to Successfully Propagate Phalaenopsis and Enjoy Beautiful Results
- Introduction
- Understanding Phalaenopsis Propagation
- Required Materials
- Step-by-Step Guide to Propagating Phalaenopsis
- Common Mistakes to Avoid
- FAQ
- Conclusion
Introduction
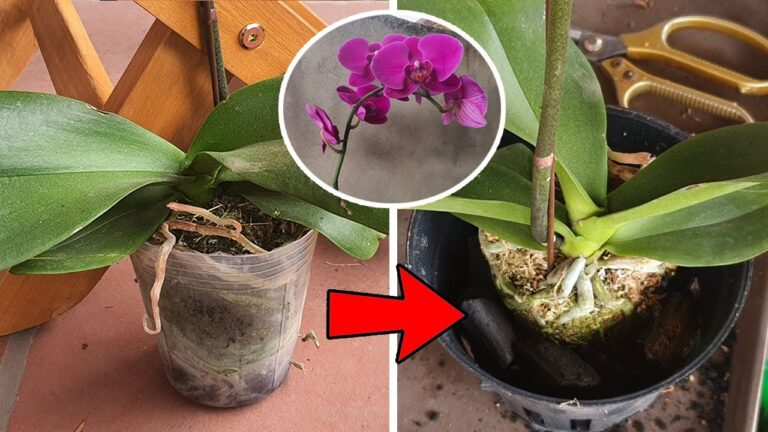
Many orchid lovers seek to expand their collection without spending a fortune. You might find yourself looking at your Phalaenopsis, wishing you could create more of these stunning plants. Fortunately, propagating Phalaenopsis orchids can be a rewarding endeavor that doesn’t require expert knowledge. By taking the right steps, you can enjoy the beauty of these orchids and share them with friends or create a lush indoor garden. Read on to discover the process of propagation and how to ensure success.
Understanding Phalaenopsis Propagation
Before diving into the practical aspects, it’s important to grasp what propagation means in the context of Phalaenopsis orchids. This section highlights the uniqueness of these plants and the methods involved.
What is Propagation?
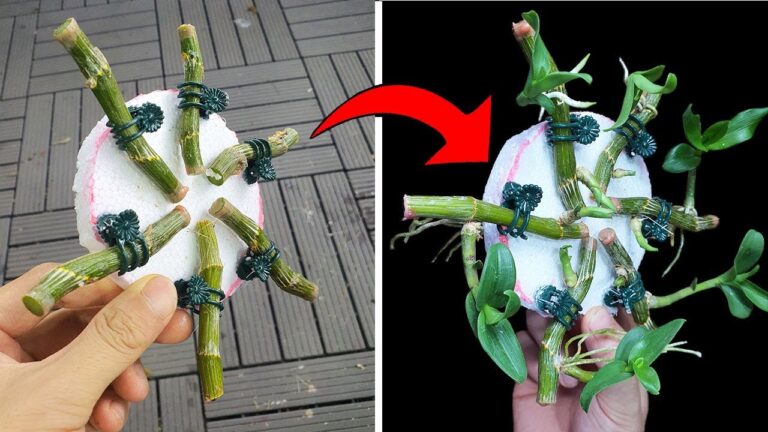
Propagation involves creating new plants from existing ones. For Phalaenopsis, you can achieve this through methods like division or keiki production. Each method has its nuances but can lead to vibrant new blooms.
Why Propagate Phalaenopsis?
Not only does propagating Phalaenopsis allow you to expand your collection, but it also gives you a chance to nurture plants that reflect your personal style. Plus, every new bloom can tell a story of growth and care.
Required Materials
Gathering the right materials is crucial to successful propagation. Here’s what you’ll need:
- Healthy Phalaenopsis orchid: Choose a mature plant that has grown several roots.
- Clean cutting tools: Use sterilized scissors or pruning shears to avoid any risk of infection.
- Sphagnum moss or orchid bark: These materials provide the right growing medium.
- Containers: Make sure to have pots with drainage holes.
- Plastic wrap: This can create humidity for the new growth.
Step-by-Step Guide to Propagating Phalaenopsis
Now, let’s explore the steps you need to take to successfully propagate your Phalaenopsis orchids.
1. Choose the Right Time
Timing is key when it comes to propagation. Spring is the ideal season, as your orchid is in its active growth phase.
2. Prepare Your Tools
Before starting, make sure all your tools are sterilized. This reduces the risk of transmitting diseases.
3. Identify the Propagation Method
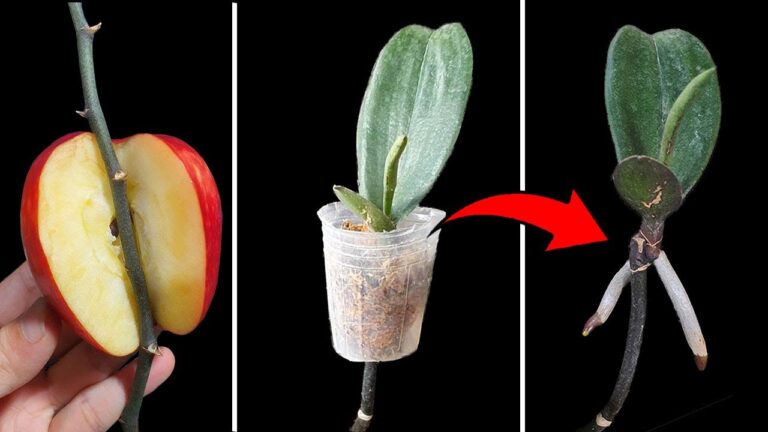
Decide whether you’re going to create keikis or take divisions. For beginners, using keikis might be simpler.
4. Make the Cut
If you’re creating keikis:
- Locate the spike: Find a healthy flower spike on your orchid.
- Cut just below the node: This will encourage growth.
If you’re dividing the plant:
- Remove the entire plant: Gently take it out from its pot.
- Split the roots: Ensure each section has roots and can be potted individually.
5. Repot the Cuttings
Place your cuttings in individual pots filled with previously prepared medium like sphagnum moss or orchid bark. Ensure the roots are well-covered but not overly compressed.
6. Create the Right Environment
To help establish your new plants:
- Cover them with plastic wrap to maintain humidity.
- Place in indirect sunlight to protect them from harsh rays.
7. Water Correctly
Keep the medium moist but not soggy. Overwatering can lead to root rot, which is detrimental to young plants.
Common Mistakes to Avoid
As you embark on your propagation journey, be mindful of these common pitfalls that can hinder your success.
- Overwatering: This can lead to root rot, particularly in new propagations that are still establishing.
- Insufficient light: While direct sunlight can be harmful, too little light can slow growth.
- Not sterilizing tools: This increases the risk of infection.
- Ignoring humidity needs: Phalaenopsis thrive in higher humidity, so maintaining that is vital.
- Neglecting temperature conditions: Ensure the propagating environment is warm, as cold can stunt growth.
FAQ
What is a keiki?
A keiki is a baby orchid that grows on the flower spike of a mature Phalaenopsis, which can be propagated into a new plant.
How long does it take to propagate Phalaenopsis?
Generally, you can expect to see new growth within a few weeks to months, depending on the method used and conditions provided.
Can I propagate my Phalaenopsis any time of the year?
It’s best to propagate in spring, as that’s when the plant is actively growing and most likely to thrive.
Conclusion
Successfully propagating Phalaenopsis orchids can be a fulfilling project that enhances your living space. With the right techniques and careful attention, you’ll be rewarded with new plants to enjoy or share. Have you tried propagating orchids before? Share your experiences in the comments below!