4 Simple Steps to Successfully Propagate Orchids and Get Amazing Results
4 Simple Steps to Successfully Propagate Orchids and Get Amazing Results
- Introduction
- Required Materials
- Propagation Methods for Orchids
- Common Mistakes to Avoid
- FAQ
- Conclusion
Introduction
As an orchid lover, you may find it challenging to get your prized plants to flourish and multiply. The delicate nature of these stunning flowers can make propagation feel daunting. Yet, with the right approach and understanding, you can enjoy rewarding results. Discovering the art of propagating orchids may be more attainable than you think. Let’s explore the straightforward steps to help you grow your orchid collection.
Required Materials
Before diving into the propagation process, it’s essential to gather the right tools and materials to ensure success. Here’s what you’ll need:
- Sharp sterilized scissors or a knife – Clean tools prevent infections.
- Orchid medium – This could be bark, sphagnum moss, or perlite, depending on your orchid type.
- Containers – Small pots or other containers that provide adequate drainage.
- Plastic bags or humidity domes – Helpful for maintaining moisture.
- Water – Ideally filtered or distilled water to prevent diseases.
Propagation Methods for Orchids
There are various ways to propagate orchids, but here are the most common methods:
1. Division
This is one of the simplest ways to propagate your orchids:
- Ensure the orchid is healthy and has at least 3 pseudobulbs.
- Remove the plant from its pot and carefully separate the roots.
- Cut through the rhizome using sterilized scissors, ensuring each division has roots.
- Re-pot each division in fresh orchid medium.
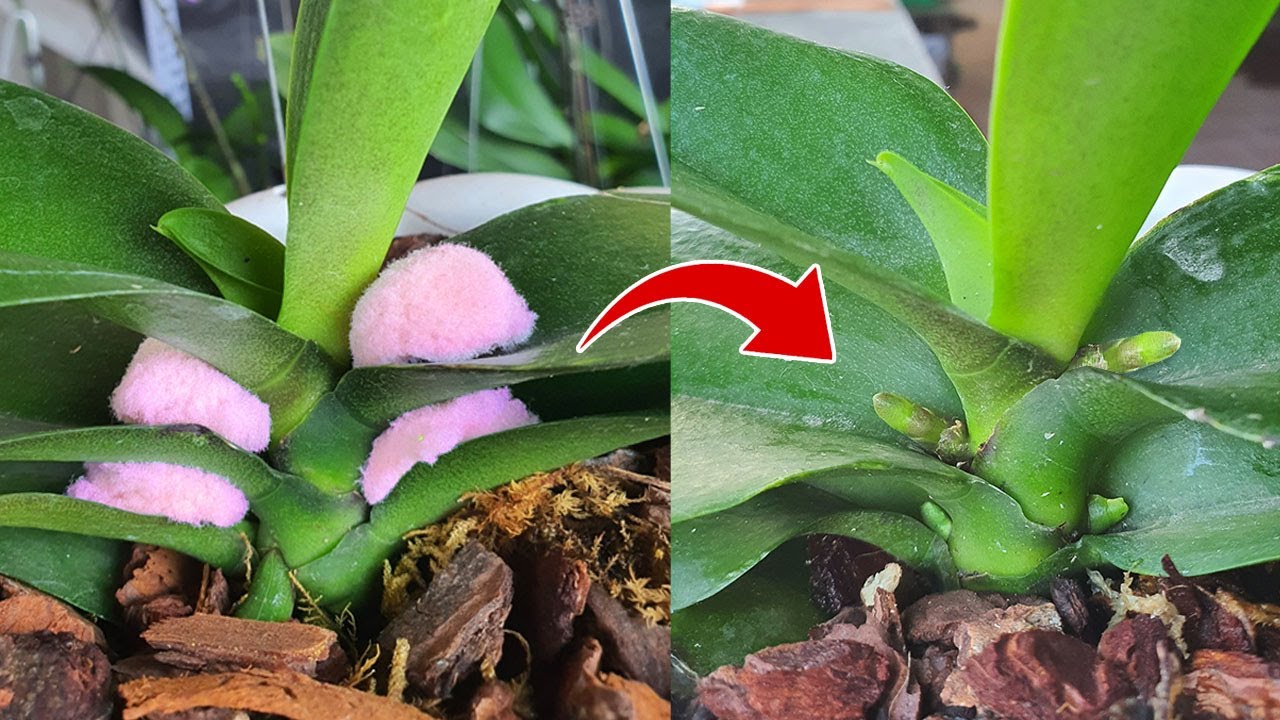
2. Keiki Growing
Keikis are miniature orchids that grow on the stems of parent plants. Here’s how to propagate them:
- Look for a healthy keiki with at least 2-3 roots.
- Carefully cut the keiki away from the mother plant with sterilized scissors.
- Plant the keiki in its own pot, ensuring it has enough support.
3. Back Bulb Propagation
Using older growth bulbs can also produce new plants:
- Identify back bulbs from your mature orchid.
- Remove them carefully from the main plant.
- Re-pot them in suitable orchid medium while keeping them moist and warm.
4. Tissue Culture (Advanced)
This method involves more precision and skill but can yield fantastic results:
- Prepare a sterile environment and medium.
- Extract tissue from a healthy orchid.
- Place the tissue in a growth medium and monitor for signs of growth.
Common Mistakes to Avoid
When propagating orchids, certain pitfalls can hinder your success. Here are some common mistakes to watch out for:
- Ignoring sterilization – Not sterilizing tools can lead to infections.
- Overwatering – This can lead to root rot and other issues.
- Choosing the wrong time – Attempting to propagate during dormancy can yield poor results.
- Lack of humidity – Orchids thrive in a humid environment, especially when young.
FAQ
What is the best time to propagate orchids?
Spring is typically the best season for orchid propagation as plants are actively growing.
How long does it take for orchids to grow after propagation?
It can take several months to a year for newly propagated orchids to bloom depending on the method used and care provided.
Can I propagate all types of orchids?
Not all orchids propagate well through the same methods; researching your specific type will yield better results.
Conclusion
Successfully propagating orchids requires patience and attention to detail, but with the right methods in place, you can cultivate a thriving collection. Have you tried any propagation techniques? Feel free to share your experiences in the comments below!