5 Easy Steps to Repot Your Blooming Orchid Without Stress
Stress-Free Guide to Repotting Your Blooming Orchid
Introduction
If you’ve ever found yourself admiring a blooming orchid, you know just how enchanting these plants can be. However, when it comes time to repot your orchid, feelings of stress and anxiety can easily creep in. The thought of damaging the roots or disrupting its growth can be daunting. But with a little preparation and the right steps, you can smoothly transition your orchid into a new pot. Continue reading to learn how to make this process as seamless as possible.
Required Materials
Before you dive into repotting, it’s essential to gather everything you need. This can help minimize stress during the process.
- New pot that’s slightly larger than the current one
- Orchid potting mix designed for orchids
- Sharp scissors or pruning shears
- Gloves (optional for comfort)
- A surface cover, like newspaper, to keep things tidy
Step-by-Step Repotting
Now that you have your materials ready, follow these simple steps to repot your orchid without stress.
- Choose the right time: Ideally, repot your orchid shortly after it finishes blooming. This allows it to recover more easily.
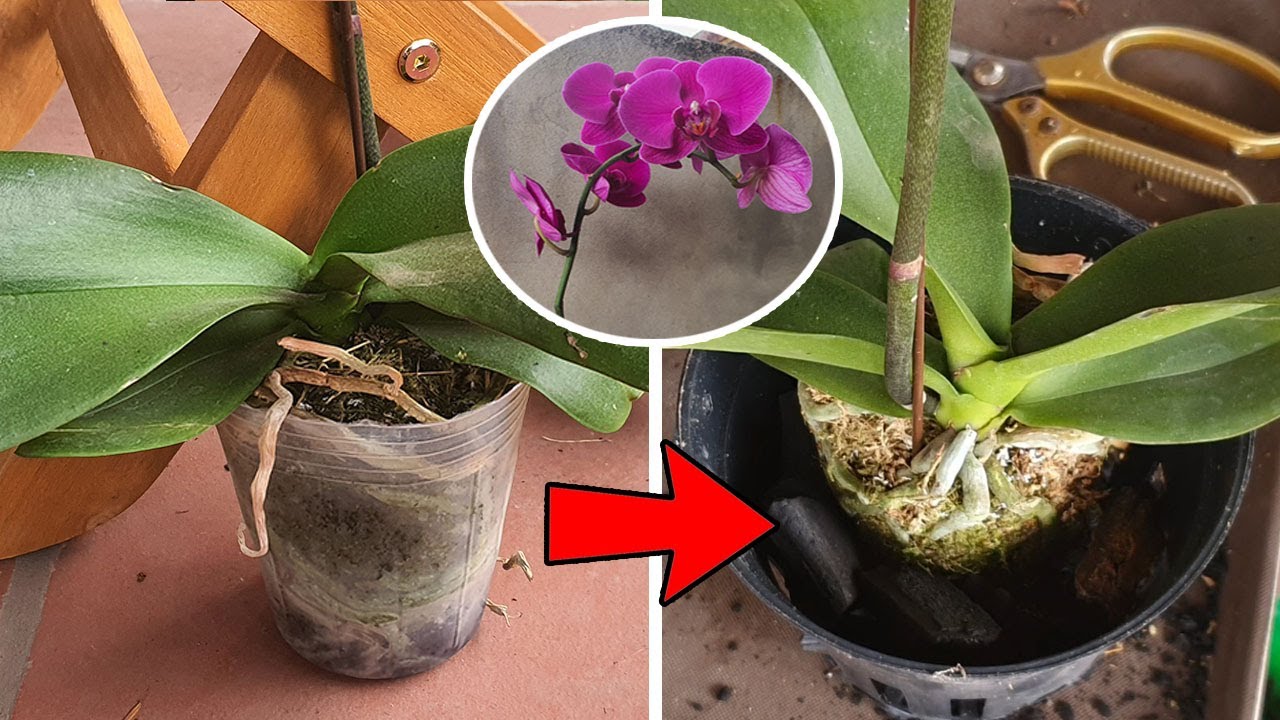
- Remove the orchid from its current pot gently. You may want to turn the pot sideways and gently tap the sides to loosen the roots.
- Inspect the roots: Look for any brown or mushy roots, and trim them off with your scissors.
- Prepare the new pot: Place a small amount of potting mix at the bottom of your new pot.
- Transfer the orchid into its new home: Ensure the roots are spread out and then fill in around them with the remaining potting mix. Make sure the base of the plant is just above the soil surface.
Tips for a Smooth Repotting
- Work in a well-lit area to see the plant clearly.
- Be gentle with the roots; they are delicate.
- If possible, use a pot with drainage holes to avoid water accumulation.
Visual Detail
Consider placing your repotted orchid in a decorative pot holder that complements your home’s decor. This way, you can add a personal touch while providing the necessary support.
Common Mistakes to Avoid
Even experienced plant lovers can make mistakes while repotting. Here are some common pitfalls to watch out for.
- Repotting during the flowering phase, which can stress the plant.
- Using regular potting soil instead of orchid potting mix, leading to poor drainage.
- Not sterilizing your scissors, which may introduce diseases.
- Packing the soil too tightly around the roots, preventing airflow.
- Overwatering immediately after repotting; wait a week to allow the roots to settle.
FAQ
How often should I repot my orchid?
Typically, orchids need repotting every 1-2 years, depending on their growth rate and the condition of the potting medium.
Can I use any pot for my orchid?
No, it’s best to use a pot specifically designed for orchids, as they require proper drainage and airflow to thrive.
What should I do if my orchid doesn’t bloom after repotting?
If your orchid fails to bloom after repotting, it might be adjusting to its new environment. Ensure it’s getting the right light and care while giving it time to settle.
Conclusion
Repotting your orchid can be straightforward if you prepare properly and follow the right steps. Remember to check for common mistakes to ensure your plant thrives after its transition. What tips do you have for repotting your plants? Share your thoughts in the comments below!