How to Make and Preserve Grape Juice Without a Juicer
“`html
How to Make and Preserve Grape Juice Without a Juicer
Preserving fresh table grapes is a delightful way to enjoy their sweet flavor through the winter months, and making grape juice is one of the tastiest methods. Whether you’re working with white or red grapes, the process remains the same, and it requires no juicer—just simple ingredients and tools. This recipe allows you to create 100% pure grape juice, letting you savor the fruit’s natural goodness.
Choosing Your Grapes
While many grape juices on the market are made from Concord grapes, feel free to experiment with other delicious varieties. Here are some tips:
- Sample the grapes first to ensure they’re sweet and aromatic.
- Note: Tart green grapes can be balanced with a small amount of honey or sugar after straining.
- Ensure the grapes are ripe; the best time to harvest is September through October.
Ingredients and Supplies Needed
Starting with grape juice is an excellent entry point for canning, regardless of your experience level. Here’s what you’ll need:
- Fresh grapes (any amount)
- Bowls for rinsing
- Large pot or stock pot
- Potato masher
- Strainer or cheesecloth
- Juice jars
- Lids
- Water bath canner
- Canning tools: jar lifter, ladles, stirring spoons, funnel, kitchen towels
Step-by-Step Guide to Making Grape Juice
Step 1: Wash and Pluck the Grapes
Gently wash the grapes, ensuring they are clean and free from residues. If the grapes show signs of pesticide use, soak them longer before rinsing. After washing, remove the grapes from the stems.
Step 2: Extract the Juice
Transfer the grapes to a large pot, adding one cup of water for every 20 pounds of grapes. Heat over medium, stirring occasionally until the juices release. Once the skins burst, mash the mixture and simmer for about 10 minutes over low heat.
Step 3: Strain the Juice
Let the mixture cool slightly before straining. Use a fine mesh strainer or cheesecloth to separate the juice from solids, pressing the contents to extract as much juice as possible. Discard the solids, preferably in a compost pile.
Step 4: Allow Sediment to Settle
Let the strained juice sit for 12 to 24 hours in a cool place, covered. This allows sediments to settle to the bottom.
Step 5: Bring Juice to a Light Boil
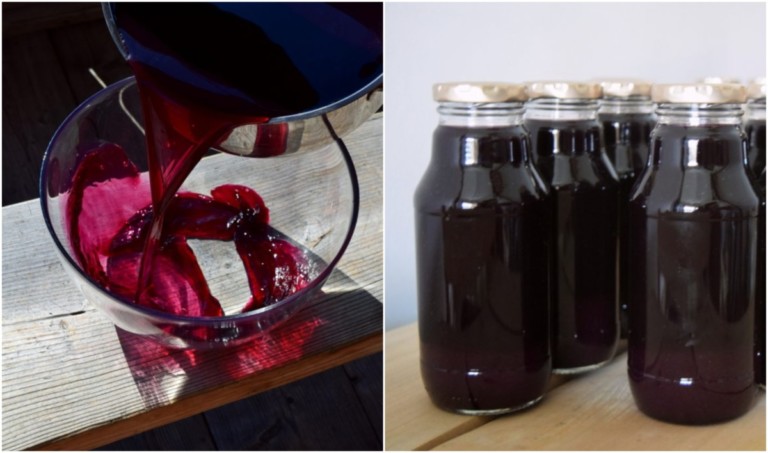
The next day, carefully pour off the settled juice, discarding any sediment. Bring the juice to a light boil for about 10 minutes, stirring occasionally. Your homemade grape juice is now ready to enjoy!
Step 6: Water Bath Canning
Prepare your jars by washing and sterilizing them. Fill the jars with juice, leaving 1/4 inch headspace. Wipe rims before securing lids. Process the jars in a water bath for 5 minutes, adjusting for high altitudes. Allow them to cool for 12 to 24 hours before checking seals and labeling.
Storing and Using Your Grape Juice
If canning isn’t your preference, you can drink the juice fresh (consume within 10 days) or freeze it for later use. Consider freezing in individual portions using ice cube trays for easy serving. Always leave enough headspace if using jars to avoid breaking as the juice expands.
If the flavor is too strong, dilute it with cold sparkling water before serving for a refreshing twist.
Conclusion
Making grape juice at home is not only simple but also rewarding, offering a way to enjoy the taste of grapes all year round. As autumn descends, embrace the season by producing this delightful beverage, perfect for any occasion. Cheers to savoring the fruits of your labor!
“`